All the Christmas Trees
- Claire
- Nov 1, 2021
- 5 min read
Updated: Dec 1, 2021
Oh Christmas tree. How beautiful and glorious. Whether simply natural in everyday splendor or decorated lavishly, these trees are a delightful addition to any mantel, shelf or window all winter long.... even way past Christmas.

The Christmas season is always so full of colorful celebration, which grind to a sudden halt after Dec 31st. Literally overnight, the lights on the trees and homes are gone, the magic evaporates, but we're still in winter. So this is one of the reasons I absolutely love these trees. They are appropriate décor to add a touch of color to your home, as the long winter nights stretch on.
Plus... they are double sided! So they are pretty both ways. How about this... paint one side in bright Christmas colors and the other in more neutral all-season shades as a fun twist?
MATERIALS:
If you need a DIY Art Kit please check here. Otherwise source the following materials:

Wooden Christmas trees in various shapes and sizes
acrylic or chalk paints in a variety of colors
paint brushes, sponge brushes or make-up wedges
paper plate
1 inch nail
glue- I prefer Aleene's Turbo Tacky Glue, but wood glue, super glue or craft glue will also work.
optional accessories like stars, lights, glitter, ribbons ...

NOTES ON COLORS:
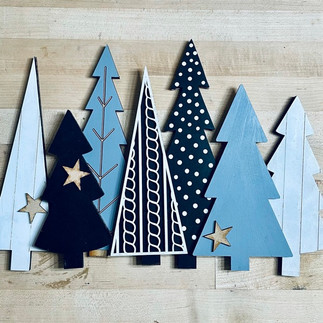
For trees to last all season, choose neutral colors, like shades of various greens, white, black, grey and brown. You can add a pop of color, if your décor style has a favorite splash. So consider one blue or red tree amongst the neutrals.
For Christmas colors, you can go brighter, like red and white, green, gold or silver.
For simplicity, try just black and white.
There is no right or wrong answer. The beauty of wood projects, is that you can paint over them if you don't like your first pass.
I like to choose 3-4 colors and mix them up between my trees, so that they aren't too busy and compliment each other.
So for my examples I picked green, teal, brown and white.
GENERAL METHOD:
Most trees come with a base shape and an overlay. Make sure that you know which overlay fit with which base. You may need to flip pieces over. It's a fun puzzle activity, especially if you got all 11 shapes!
Paint the base shapes first, so they can dry.
Use a paint brush or sponge wedge and blot color on very sparingly.
Too much paint will run over the edge and cause a messy finish.
Do not use water, because it can swell the wood!
For overlays, use a make-up wedge and the tiniest amount of paint. Too much paint will pool in the cut out shapes and affect the delicate patterns. Do not use water!
Start with one color on one tree, and then add a little white to the same color for the next tree to create a different shade.
Paint both sides, for variety! Flip them around as the season turns from festive to just winter and beyond.
EXAMPLES:
To skip forward to the truck see here.

Colors: Green and white.
Blot green paint onto the tree with a wedge.
Dip part of the same wedge into white. Blot off the excess and stamp from the outside edges inwards, leaving an uneven texture.
Keep blending until you are happy with the texture.
Try it with your own color scheme!

Same as above, but in blue for an interesting splash pf color.
Try it in red or black or something unique!

Colors: Brown and white
Using a sponge brush or wedge apply paint in long streaks.
Dry.
Dip the tip of a scruffy brush, toothbrush or dry sponge brush into white paint.
Blot off excess on a paper towel
Streak lightly across your tree to create a barn wood effect.
Also works in reverse: white base with brown or grey streaks!

Colors: white
Wipe paint sparingly over the shiplap shape with a sponge brush or wedge.
Use a 1 inch nail or picking tool to scrape excess paint out of the lines.
Optional: distress with a scruffy brush dipped into grey or brown!

Colors: green and white
Separate the stem gently from the tree. It is very delicate!
Blot green paint sparingly over the tree with a wedge or paint brush.
Blot white paint sparingly over the stem.
Dry.
Assemble by placing the stem back into the base.
Optional: add snowy edges by wiping a make-up wedge dipped into white paint and blotted dry, over the edges of the tree.

Colors: green (or any other color you like!)
Separate the stem gently from the tree. It is very delicate!
Blot green paint sparingly over the tree with a wedge or paint brush.
Dry.
Leave the stem natural.
Assemble by placing the stem back into the base.
Optional: add snowy edges by wiping a make-up wedge dipped into white paint and blotted dry, over the edges of the tree.

Colors: green and white
Blot green paint sparingly over the tree with a wedge or paint brush.
Dry.
Assemble by placing the stem back into the base.
Dip the flat tip of a nail into white and stamp dots.
Choose different colors for a fun effect!

Colors: Teal and white (or any colors you prefer)
Paint the base shape in an ombre look, by gradually adding some white to the teal as you proceed along the shape. I started on the bottom right hand corner in teal and kept working more white into the teal as I moved along to the tip diagonally.
Blend.
Blot teal paint sparingly onto the overlay.
Or try using a contrasting color like gold!


For busy overlay patterns, keep the base color simple.
Blot paint very sparingly onto these busy overlays to prevent paint from pooling in the cut out areas.
If your base is dark, paint your overlay in light and vice versa.

For more solid overlays, like the leopard print, use strongly contrasting colors to accentuate the pattern, such as white on the base and color on the overlay.
ASSEMBLE:
Apply a tiny amount of glue to your overlay with a thin applicator or q-tip.
Press overlay onto the base.
Insert tree into its oval stand.
The fit will be tight, to make it sturdy. If you have used too much paint and the base does not fit into the stand, use some sandpaper on the stem until it fits into the slot snugly.

Display with pride!
Alternate trees to have a busy one next to a simpler one.
Style with mini light strands, ribbons, ornaments or stars.

How will you paint your trees?
THE TRUCK
Although not essential to your forest, this stand-alone truck is a super-cute addition.

This truck is 2-sided and, once assembled, stands on its own, with a removable tree.

The truck comes in 16 pieces:
1 truck base (paint both sides)
1 tree (paint both sides)
4 fenders- 2 for each side (paint one side)
4 wheels- 2 for each side (paint one side)
2 fences- 1 for each side (leave natural)
4 hubcaps- 1 for the center of each wheel (leave natural)

The tabove photo shows the first side of the truck, with the additional pieces, that will go on the backside once painted.
Paint each piece with a sparing amount of paint.
Do not overload with paint.
Do not use water.
Once dry, align the front side fenders with the score line and glue into place.
Glue the wheels directly under the fenders, without space, so that your hubcaps will fit onto the base.
Glue the front fence onto the truck, up to the first crossbar.
Dry.

Flip it around and mirror this sequence on the back, making sure that your wheels are aligned straight. If you do not align them, correctly, your truck will not stand on is own and will fall over.
Once assembled, slide your tree into the back. It will sit snuggly, and won't require glue. This gives you an option of substituting it for another icon in the future.
Enjoy!

I can't wait to see what you do with your forests! Please share them with me directly at claire@threeand.me or on social media with tag @threeandme.
Thanks for joining me!
Wishing you and yours a blessed and peaceful holiday season.
Warmly,
Claire
xoxo


Comments